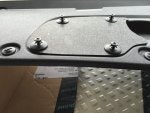

I don't know if anyone else has noticed this, but getting to the brake fluid reservoir is a major pain. You have to remove *all* the trim from around the luggage well under the hood (bonnet for you queen's english speakers). And to remove that nasty last big one over the reservoir/master brake cylinder, you have to remove both windshield wiper arms and carefully unsnap it along the entire length of the bottom of the windshield. It's a major operation.
I bleed my brakes before every other track event. I'm sorry, it's just not acceptable to do that amount of tearing apart of the car just to pour in some brake fluid.
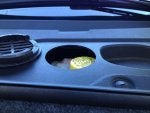
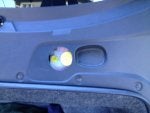
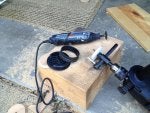
So, I got out my drill and cut a 4" hole in the trim over the reservoir, and put in a nice looking plastic plug thing so it looks nice and clean. Check it out:
![Image]()
![Image]()
I went to the local home store and bought that 4" pvc drain cover, and modified it slightly to clear the cap on the brake fluid reservoir. You could leave the hole open or use some other cover. Works for me.
mt
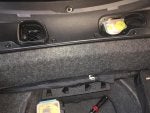
I bleed my brakes before every other track event. I'm sorry, it's just not acceptable to do that amount of tearing apart of the car just to pour in some brake fluid.
So, I got out my drill and cut a 4" hole in the trim over the reservoir, and put in a nice looking plastic plug thing so it looks nice and clean. Check it out:


I went to the local home store and bought that 4" pvc drain cover, and modified it slightly to clear the cap on the brake fluid reservoir. You could leave the hole open or use some other cover. Works for me.
mt
")